In my previous post, I showed photos of a roofing system with serious issues.
- There was over-spanning of the roofing rafters.
- There was a lack of valley metal at the roof’s transitions, which caused leakage.
- The leaking was so severe that the water ran down the old roof, which was beneath, and a 2 x 4 ledger created a dam so that the leak was the entire length of the home.
- The plywood was undersized (3/8” when ½ is needed.
- The plywood was spaced improperly, which caused it to buckle from the changes in the air moisture content, which caused it to cut the underside of the felt and shingles, causing more leakage.
- There were no diagonal braces to support the roof and keep it from collapsing sideways.
- The sheets of plywood were laid both vertically and horizontally.
- The last item is not structural but aesthetically improper: when the roof transitions around the dormer the two side do not come out the same way, yet the sheeting was laid continuously and it cause the roof to twist and roll.
I felt, the work needed to be done requires the aid of an architect and someone capable of doing the calculations for their proposed solutions.
I understand that some like to do their drawing, but I have stopped doing so. A good architect will save you money in the long run. Designing this new system is not my way of saying I was not involved in this process because I was. I drew the as-built and took the measurements, and we communicated how we wished to tackle the project. Because there is only so much, a visual inspection will allow one to see we anticipated discoveries, but not to the extent we uncovered. It appeared the original framer of this improved system was going to miss the apex of the roof and run a 54’ cricket in the valley he created and then thought better of it. He then ripped an 8’ 2 x 4 and scabbed it to the top of his newly cut rafter and the existing apex of the roof. He did this by having the 2 x 4 weight transfer point being the 1&1/2” tip of the newly cut extensions. This procedure created what we thought was a sag in the roofing members due to the over span. The discovery included that the over span did not cause this pond to be created on the roof it was by design.
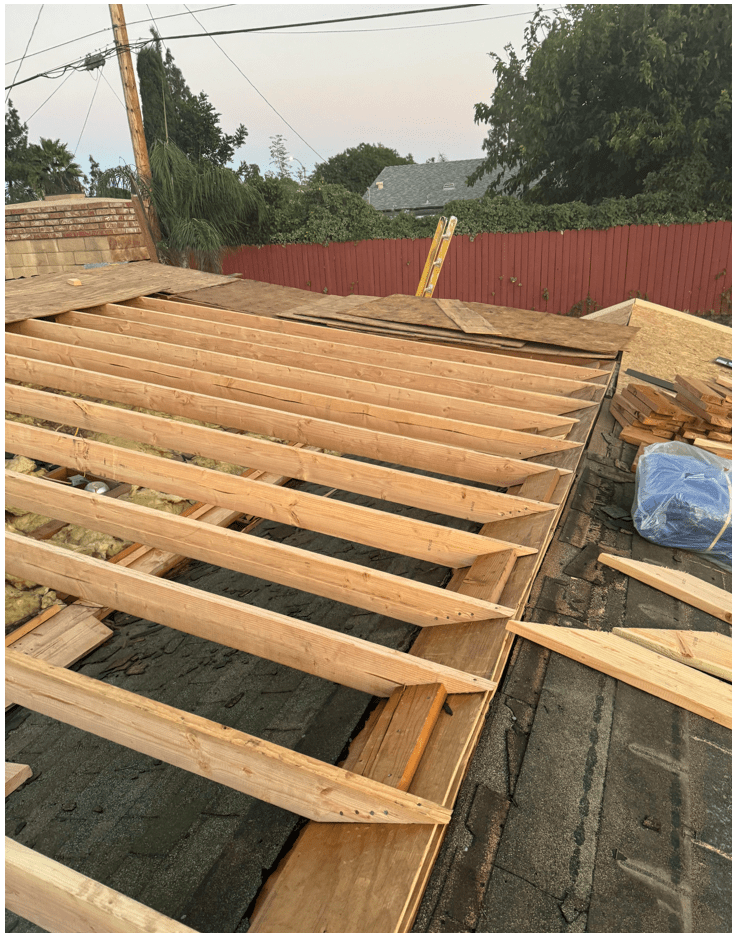
I have completely removed all the felt paper and shingles from this area. I am in the process of removing all the old 3/8” plywood. I am cutting new rafters which span the area from apex to apex. While doing so, I am also cutting out 4 to 5 of the old framing systems and replacing them with a properly cut rafter. Note you can not remove all the rafters from one side of the roof all at once; it is very likely doing so would cause the system to collapse.
The old rafters were nailed into place with one nail at each end of the rafter, and the nail did not have to be a 16D sinker. Before I install my new rafters, I clean the old roofing material from the area. I then rip some of the existing 3/8” plywood I removed into 11’ strips and nail it where my new rafters will land on the existing roof. This landing preparation has two layers. My new rafters are nailed top and bottom, presaged into place by the aide of the pressure blocks, and nailed with 5 16 D sinkers top and bottom.
When this task is completed, I will go into the belly of the roof and add a double sell plate and then queen studs at 32” on the center nail into the new rafter and pressure blocked into the seal plates. I will then nail in a purlin to the queen stud and make a solid connection between the rafters and the purlin by adding hurricane clips at each rafter from purlin to rafter.
Once this has been completed, I can sheet the area with 1/3 OSB. Then, finish stripping the lower portion of the roof. I will then feel the side to present a dry place. The photos provided are of my work. The following side will involve a completely new solution because it lacks the mid-span bearing walls to transfer the load to.
After stripping away the three layers of shingle I ripper 12” wide strips of plywood and doubled to provide a nice surface for the rafter tails to land. I cut the rafter to lengths with the proper angles. To better attached these rafters, I used pressure blocks and Five 16D nails at each point of connection. The stack of plywood at the far end of this photo is the edge of the roof and I have not as of yet fixed this area.
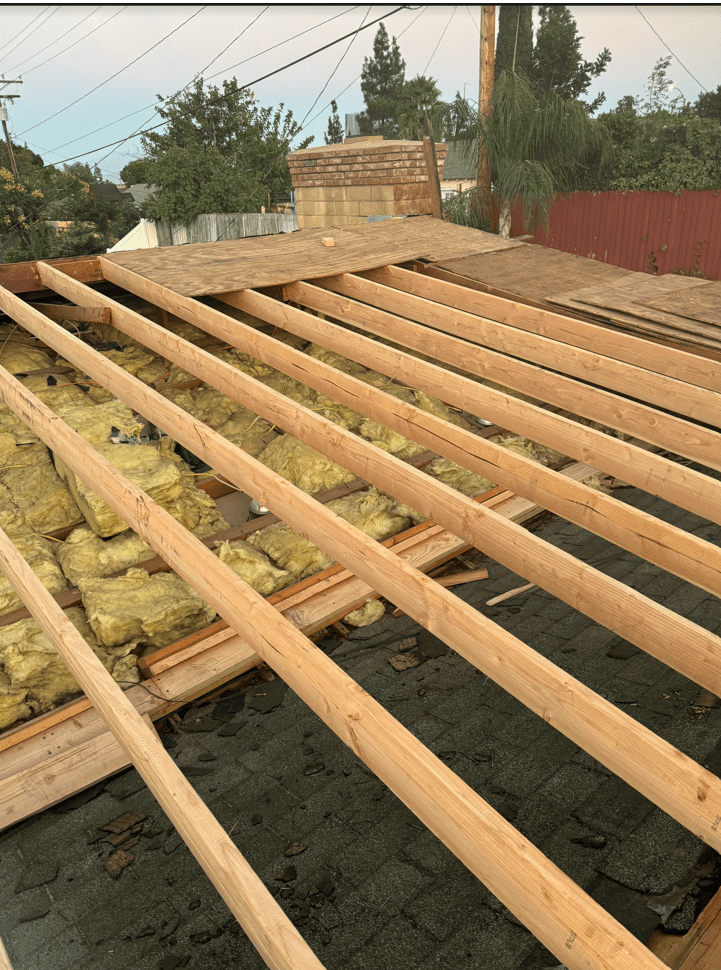
This view shows that the rafter are cut so that each rafter is in line with the other rafters. Note when you cut your rafters be sure to eye down the length of each board used for rafters. This is so that you can always frame with the crown of the material up. When every board is crown up the roof profile line will be straight. The hump you see will flatten out once the roof is supporting its own weight. In the belly of the system, you can see what is a 2 x 6 double seal plate. This is above the bearing wall below. I needed to get this material under the roof before I closed in the final rafters. Tomorrow after I have finished the last four rafter, I will Plumb up from the double seal plat through the rafters. At 32 “on center I will cut queen studs that I will nail into the side of the rafter with a five nail 16 D pattern. When this has been completed, I will nail a 2 X 6
I will anchor into the double bottom seal wither the aide of pressure blocking. Once this is finished, I will run a vertical 2 x 6 that supports the load of the rafter. These also will have the five-nail pattern. I will then attach the rafter to the vertical member with hurricane clips at each rafter and joist intersection.
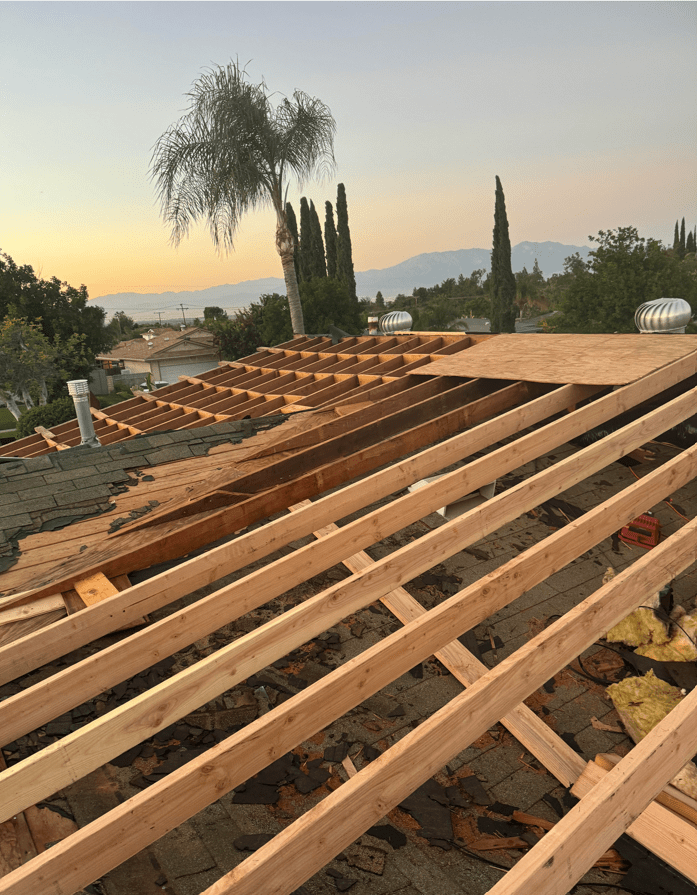
This view shows a section on the other side of the dormer. It will be stripped and redone as the other side I will be finishing. Note the blocking 2’ on center the length of the rafters. This most likely was done because it makes it easier for the over spanned area to survive.
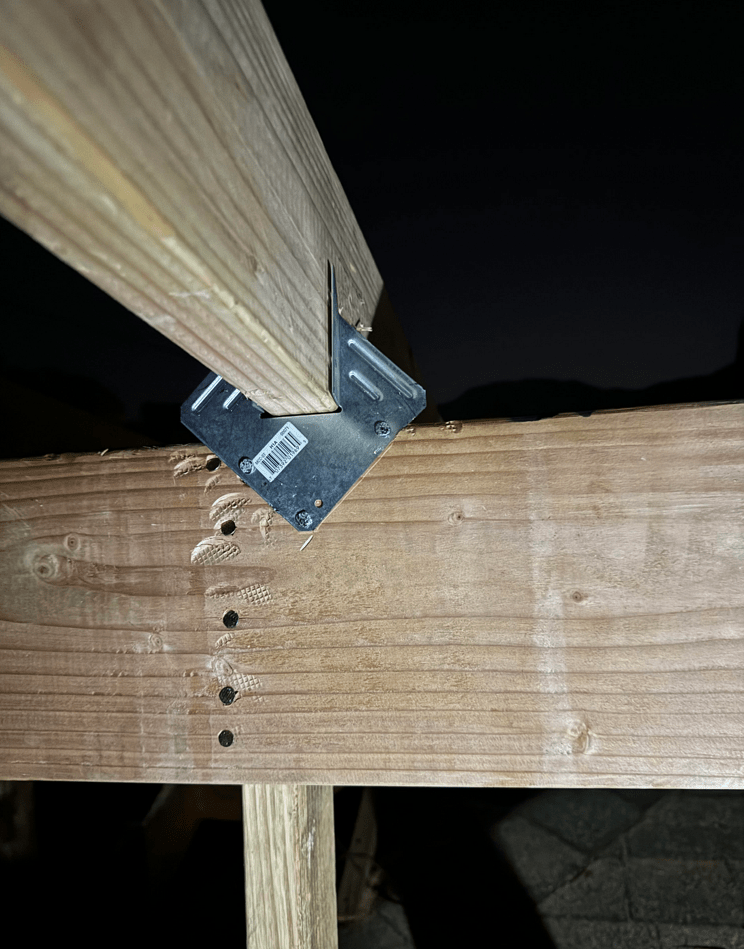
This is a view of the Queen stud coming up from the double seal plates where they are pressure block in @ 48” on center as call for in the plans. They are nailed into the side of the rafters and then the 2 X 8 purlin is nailed into the purlin. Finally, the rafter is held in place by the H 1 clip better known as a hurricane tie. Though this sound simple it can get complicated because flying the facia boards can be tricky and if you remove the right members at the wrong time you may collapse the entire roofing system. There are H 1 clip at each inter section where rafter meets the purlin.
Note: Images on this blog site are from a free source or taken by the author. No image or group of photos are intended to represent the people the author serves. The author does not care about Race (that is a politically correct term that he does not like because we are all of the same Race, the Human Race. He prefers the term ethnicity), color, religion, sex, gender, marital status, disability, genetic information, national origin, source of income, Veteran or military status, ancestry, citizenship, primary language or immigration status. He is a service provider for all people. We will all rise together when we band together and help one another. Joseph Erwin is a Real Estate Broker, DRE # O2131799, and a CA general contractor # B 696662. He’s a member of the CRMLS and The East Valley Association of Realtors located in the Inland Empire region of Southern California.

Leave a comment